Netlify CMS
Netlify CMS is open source Git-based Headless CMS which is provided by Netlify.
All contents are pushed to Github repository and multiple users can post and edit contents via admin UI.
What is Git-based CMS? There are roughly two types of Headless CMS,
- API-based
- Git-based
In Api-based CMS, we end up depending on the platform of CMS.
On the other hand, Git-based uses git repository as a DB, and CMS does “push” to git repository instead of us.
It’s just like a mediator between Github and us.
Git-based is simpler, free and everything is under our control.
Personally, I prefer to use Git-based CMS so I’m gonna use it in this article.
What we’re gonna make
Make a simple digital diary using Netlify CMS.
This is a very minimum structure, so I hope it’s easy to understand.
Step 1
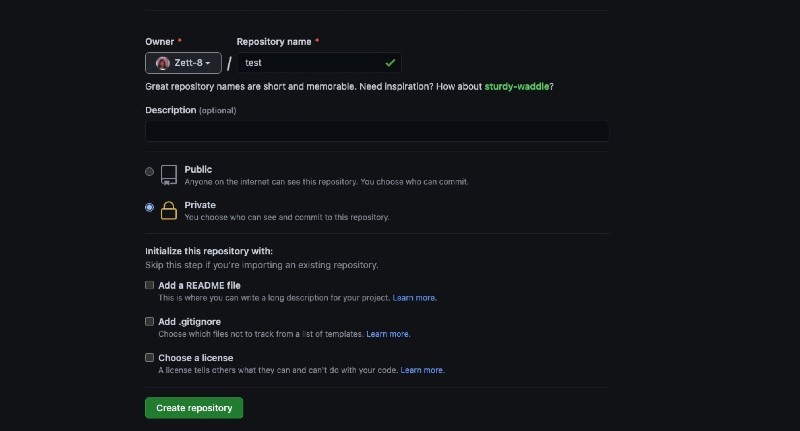
First things first. Let’s make a new repository on Github and publish it on Netlify.
Just a simple HTML file is enough this time because the CMS part is the main topic.
*
└── public
└── index.html<!DOCTYPE html>
<head>
<meta charset="UTF-8">
<title>Diary</title>
</head>
<body>
<h1>Hello World</h1>
</body>
</html>Make a new repository then push our commit.
git init
git add .
git commit -m 'init'
git remote add origin master <your repository address>
git push -u origin master
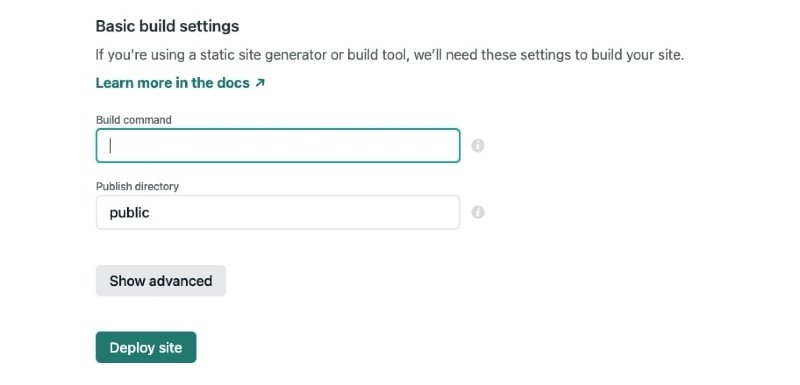
Publish on Netlify.
No build command and publish directory is “public”
Step 2
OK, let’s tackle CMS settings.
Make a new directory “admin” inside “public” then create index.html.
*
└── public/
     ├── index.html
     │
     └── admin/
          └── index.html
There are only 3 things to do for index.html
- Load “netlify-identity-widget” for login feature.
- Load Netlify CMS file.
- Set up redirect path for after login.
<!doctype html>
<html>
<head>
  <meta charset="utf-8" />
  <meta name="viewport" content="width=device-width, initial-scale=1.0" />
  <title>Content Manager</title>

  <!--  1. Load "netlify-identity-widget" for login feature.  -->
  <script src="https://identity.netlify.com/v1/netlify-identity-widget.js"></script>
</head>
<body>
  <!--  2. Load Netlify CMS file.  -->
  <script src="https://unpkg.com/netlify-cms@^2.0.0/dist/netlify-cms.js"></script>

  <!--  3. Set up redirect path for after login.  -->
  <script>
  if (window.netlifyIdentity) {
    window.netlifyIdentity.on("init", user => {
      if (!user) {
        window.netlifyIdentity.on("login", () => {
          document.location.href = "/admin/";
        });
      }
    });
  }
</script>
</body>
</html>
We need to load “netlify-identity-widget” on public/index.html as well.
<!DOCTYPE html>
<html lang="en">
<head>
  <meta charset="UTF-8">
  <title>Title</title>

  <!--  Load "netlify-identity-widget" for login feature.  -->
  <script src="https://identity.netlify.com/v1/netlify-identity-widget.js"></script>
</head>
<body>
  <h1>Hello World</h1>
</body>
</html>
Step 3
Inside “admin” directory, create the setting file called config.yml.
This setting file is the key but I struggled at first because it’s a bit tricky.
*
└── public/
     ├── index.html
     │
     └── admin/
          ├── index.html
└── config.ymlbackend:
name: git-gateway
branch: master
media_folder: "./"
public_folder: "./"
collections:
- name: "diary"
label: "Diary"
folder: "diary"
create: true
slug: "{{title}}"
path: "{{year}}/{{month}}/{{slug}}"
fields:
- { label: "Title", name: "title", widget: "string" }
- { label: "Date", name: "date", widget: "datetime" }
- { label: "Body", name: "body", widget: "markdown" }I’m gonna explain one by one.
The first setting is for a declaration that we use Github repository and specifying the branch name.
backend:
  name: git-gateway
  branch: master
Next setting, media_folder and public-folder, is for specifying where we store upload files.
For example, you want to store images like the following,
*
└── public/
     ├── index.html
     │
     ├── admin/
     │    ├── index.html
     │    └── config.yml
     │
     └── static/
          └── image/
set like this.
media_folder: "public/static/image"
public_folder: "/image"
I’m not gonna upload images this time, so I leave them blank.
Before moving on to the next setting, let’s think about where and how to store diaries.
For this time, let’s say there are year directories and there gonna be month directories underneath, then we store a diary in a month directory.
*
├── public/
│    ├── index.html
│    │
│    ├── admin/
│    │    ├── index.html
│    │    └── config.yml
│    │
│    └── static/
│         └── image/
│
└── diary/
     ├── 2020/
     │    ├── 11/
     │    └── 12/
     │
     └── 2021/
          └── 01/
*These directories are automatically created so we don’t have to prepare them.
Next is the final setting.
collections:
  - name: "diary"
    label: "Diary"
    folder: "diary"
    create: true
    slug: "{{title}}"
    path: "{{year}}/{{month}}/{{slug}}"
    fields:
      - { label: "Title", name: "title", widget: "string" }
      - { label: "Body", name: "body", widget: "markdown" }
Each property represents the followings,
- name: Post type identifier. Must be unique.
- label: What the admin UI calls the post type.
- folder: Where files of this type are stored, relative to the repo root.
- create: Set to true to allow users to create new files in this collection.
- slug: Template for filenames.
- path: Path to store files.
- fields: Fields in the content editor
{{title}} refers “title” of fields but {{year}} and {{month}} are default templates which Netlify CMS provides. It will be automatically populated with our posting datetime.
Let’s push to Github again.
Netlify will republish a new version of our website, triggered by git push.
git add .
git commit -m 'set netlify cms'
git push
Step 4
It’s almost done! But there is one more thing to do to enable the login feature.
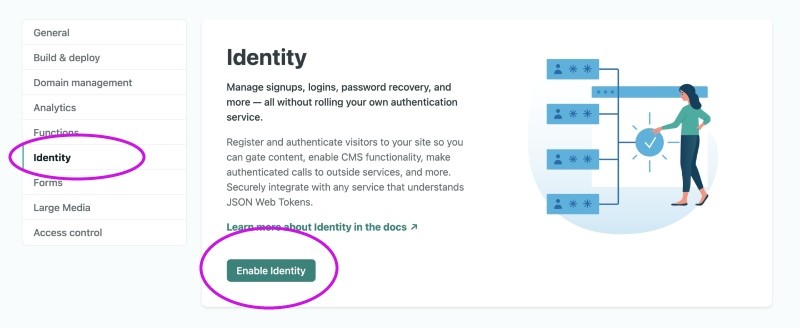
From the site page on Netlify > Site settings > Identity
Click [Enable Identity].
Scroll down and also enable Git gateway.
Now we access admin UI, finally.
https://<your_app_adderss>.netlify.app/admin/
We need to set up an account at first. You will get the verification email after sign-up so verify your account by clicking the link inside the email.
Welcome to admin UI! We can see “Diary” specified in config.yml. Let’s click “New diary” and post a new one.
We can also see “Title” and “Body” specified in config.yml.
Write title and body then click “publish”.
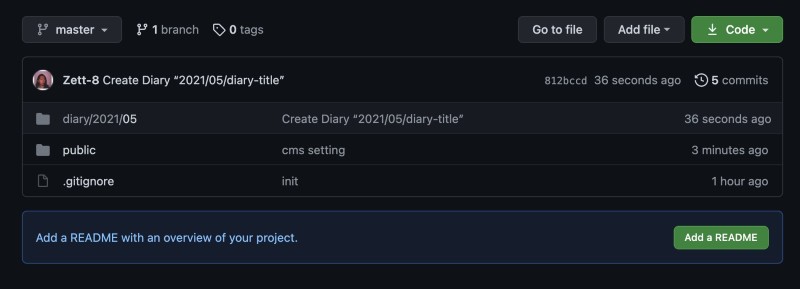
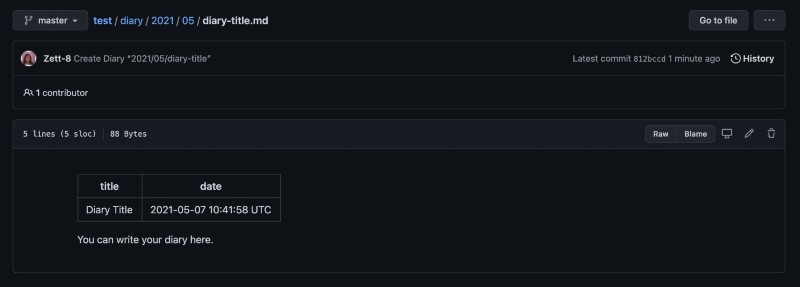
Go check Github repository. Ta-da! It’s created in the right directory.
We can see it in the console as well.
You can use Headless CMS partially
That was very easy, wasn’t it? All you care about is just config.yml.
As you might have noticed, you can use Headless CMS partially in your project.
That flexibility is one of the Pros of Headless CMS.
Schema is also flexible, You can use array and object or nested one.
Please refer official document and try other cool features by yourself :)


